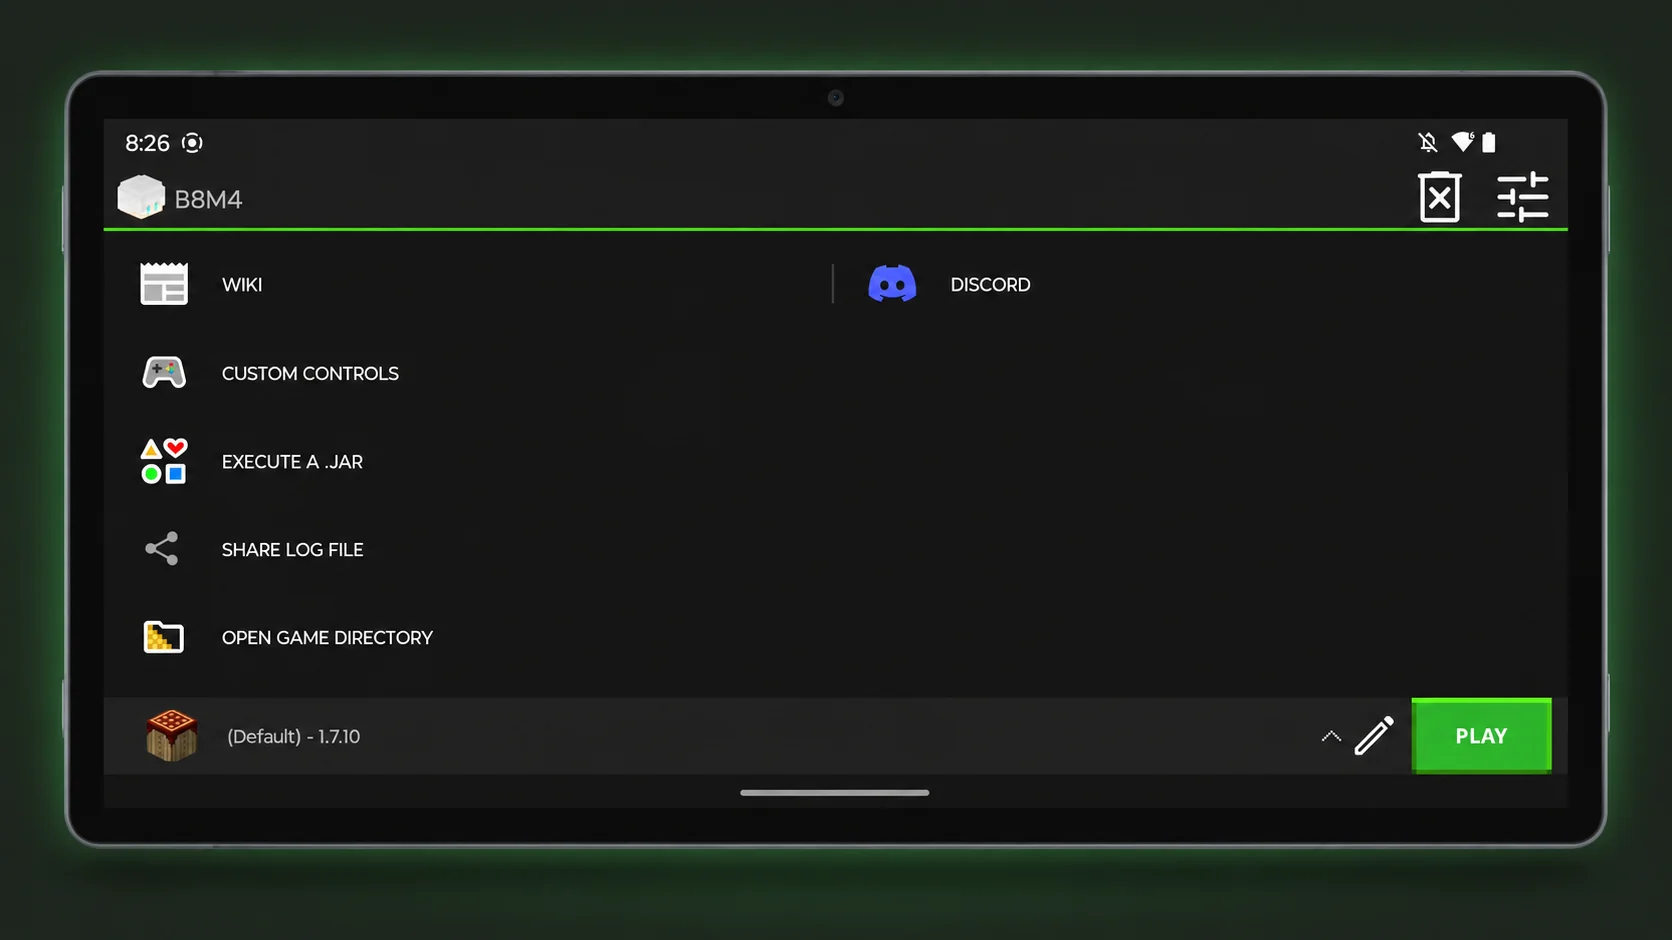
To use Pojav Launcher on Android, open the app, add your Microsoft account and create a Minecraft Java Edition profile. Choose a supported game release, save the profile and tap Play. After the files finish downloading, you can open a world or join a compatible Java server.
The first setup is easier when you start with a plain game profile. Get that working before adding OptiFine, mods or a resource pack. Below, you will find the account, version and settings menus explained in the order you need them.
What Do You Need Before Starting?
Have the launcher installed, a working internet connection for sign-in and downloads, and enough free storage for game files and worlds. Use a Microsoft account with Minecraft Java Edition access when playing the full game with a licensed account. A Bedrock-only purchase is not the same game entitlement.
Performance depends on the Android device, Minecraft version, renderer and extra content. Instead of copying someone else’s RAM allocation or expecting their FPS, first test a small world with simple settings. Keep a backup if you already have worlds on the phone.
Also keep the launcher version and Minecraft version separate. The launcher is the Android app; the game release is chosen inside a profile. You do not need a different APK every time you want to choose another supported Minecraft release. Our archived launcher versions guide explains the difference.
How to Use Pojav Launcher: Install and Sign In
1. Open Your Installed Launcher
- If you need the app, save the Android package from our PojavLauncher APK download page.
- Open the downloaded APK and complete Android’s installation steps. If requested, allow the browser or file manager to install unknown apps.
- Open PojavLauncher and let first-run preparation finish.
- Read any permission prompts. A notification preference is separate from your Minecraft account login.
These steps describe a downloaded APK. If PojavLauncher is already installed, open that installation and continue below. Do not uninstall a working setup without backing up its worlds and control files.
2. Add Your Microsoft Account
Tap Add account at the upper left. If another player name is already shown, open that account area to access the account choices.
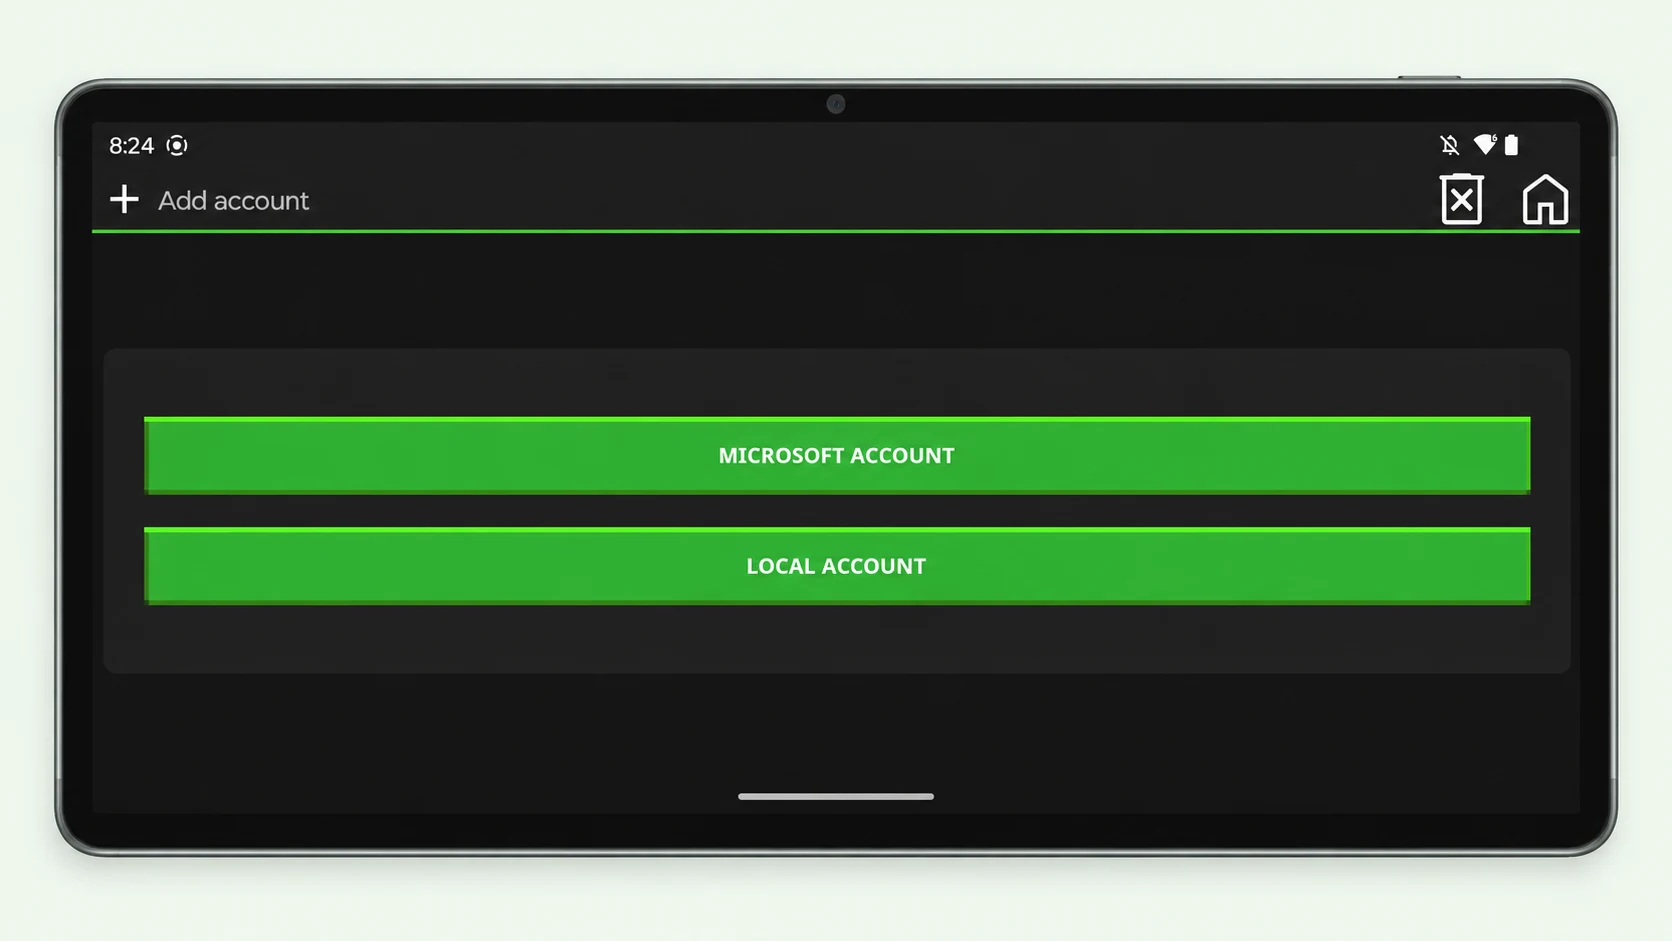
- Choose Microsoft Account.
- Sign in with the Microsoft account you use for Minecraft Java Edition.
- Complete any verification that Microsoft requests and wait for the login to finish.
- Return to the launcher and check that the expected player name and skin icon appear at the top.
The illustrated menu also offers Local Account. That is a separate account mode; typing a player name there does not create a licensed Microsoft session or grant access to authenticated servers. For account-based multiplayer, select the Microsoft account that has the game access you need.
If sign-in does not finish, check your connection and try again. Because this is discontinued software, an archived build can also run into changes in current authentication services. Changing to a local name does not repair a Microsoft login failure.
Create a Minecraft Game Profile
3. Open the Profile List
On the main screen, look beside the green Play button. The pencil/profile control opens the available setups. Choose Create new profile when you want to add another game setup.
A profile gives you a recognizable name and stores choices such as the Minecraft version and default control map. Check the selected profile before launching, especially if you have several game versions or mod loaders installed.
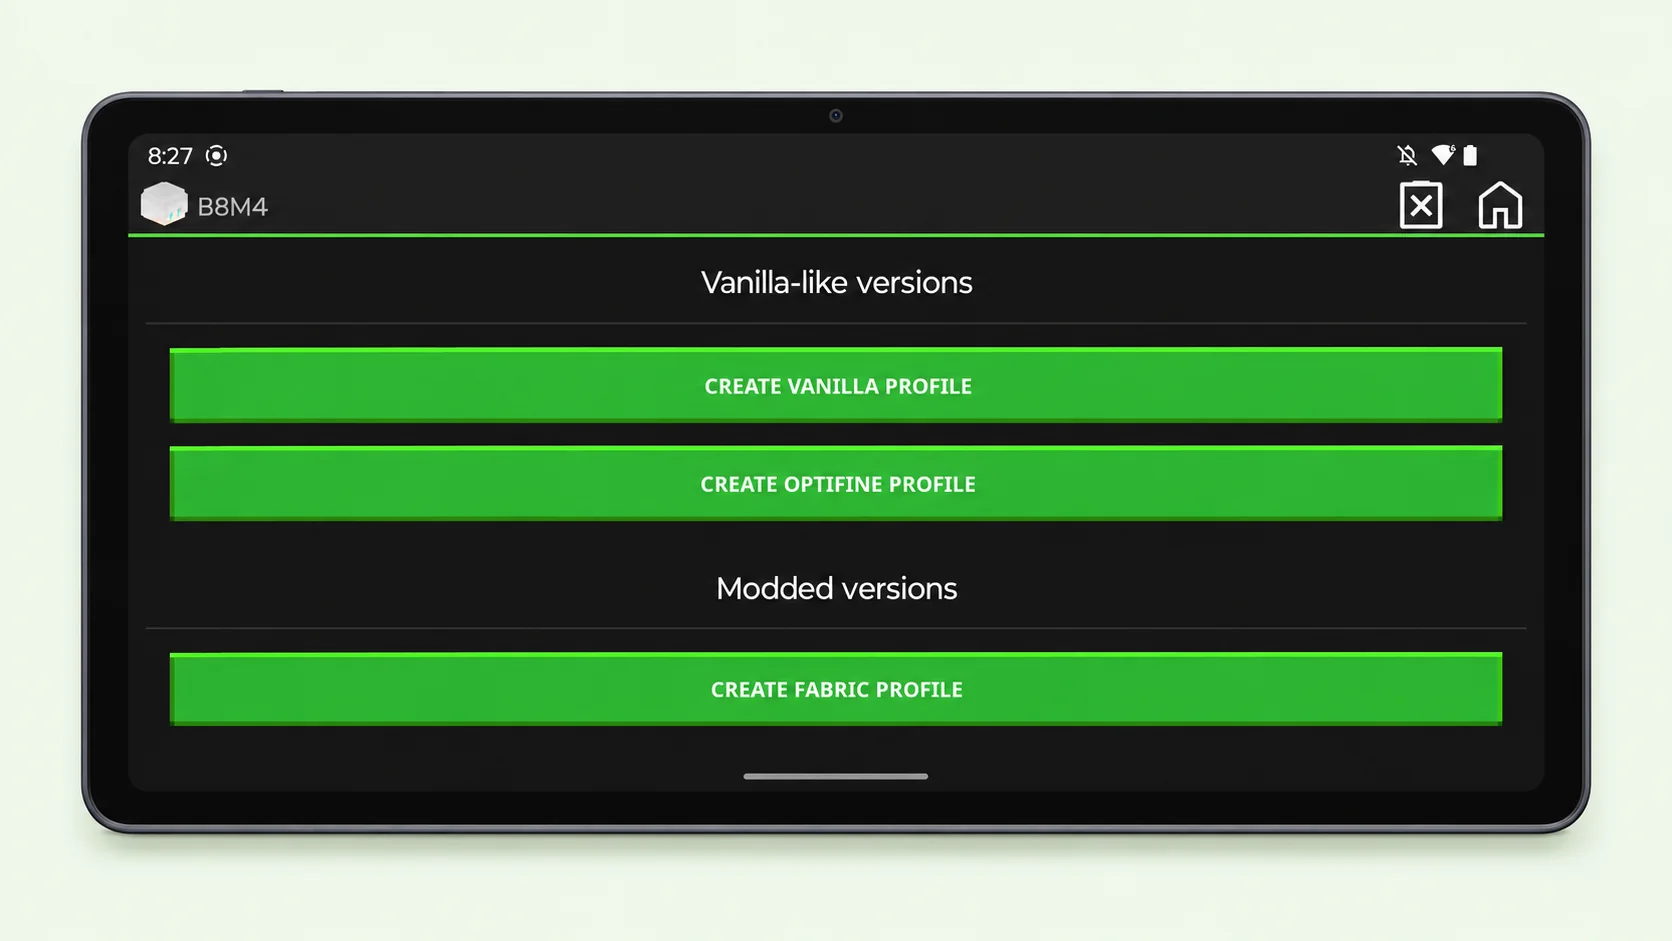
4. Choose a Vanilla Profile First
For your first test, choose Create vanilla profile. Vanilla means the standard game without a mod loader. The same menu can offer OptiFine, Fabric, Forge or other profile types depending on the build, but those are better added after the base game works.
- Give the new profile a useful name, such as “Java Test”.
- Find the Version field and tap SELECT.
- Open the release list and choose the supported Minecraft version you intend to play.
- Leave custom JVM arguments and other advanced fields unchanged for the first launch.
- Tap SAVE, then select that profile on the main screen.
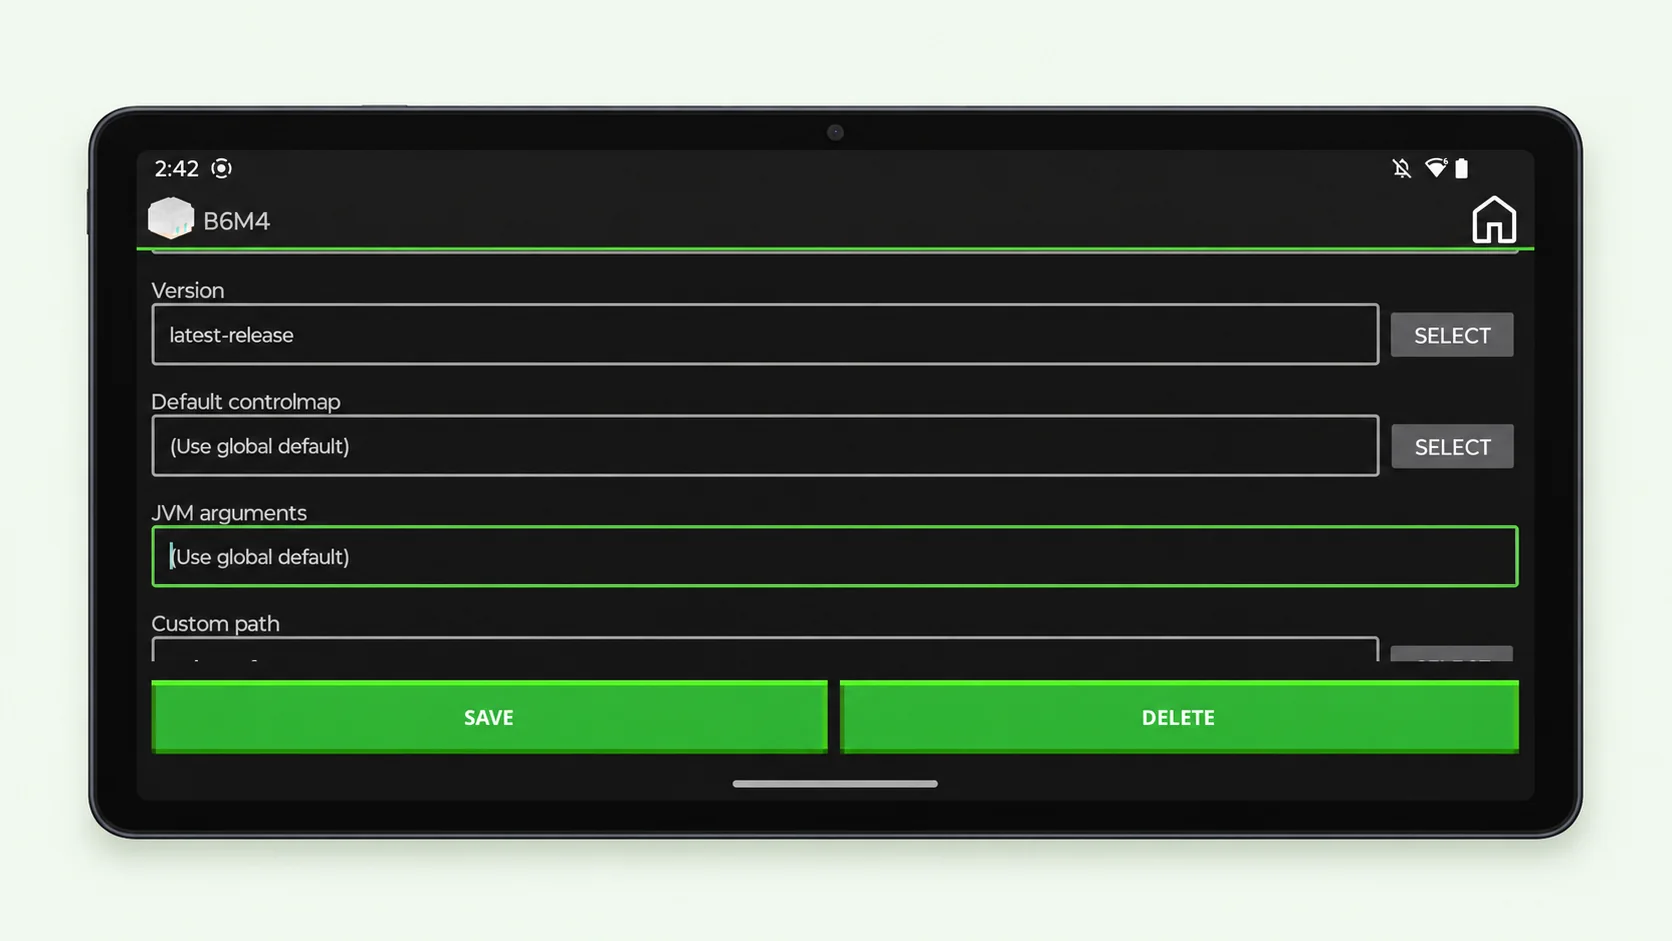
Choose a specific release rather than assuming the latest-release label will always work with an archived launcher. For a server or modded setup, use the version required by that setup. The numbers visible in these example screens are not a recommendation for every phone.
Launch Minecraft and Test a World
5. Tap Play and Let the Files Download
Check the selected account and profile, then tap Play. The first launch downloads the game files and libraries needed by that setup. Keep your internet connection active and leave the launcher open while the task is progressing.
Some builds let you expand the download/task area with the small arrow near the bottom. Use it to check whether files are still downloading. If progress stops or an error appears, read the message before trying again; repeatedly pressing Play will not speed up the download.
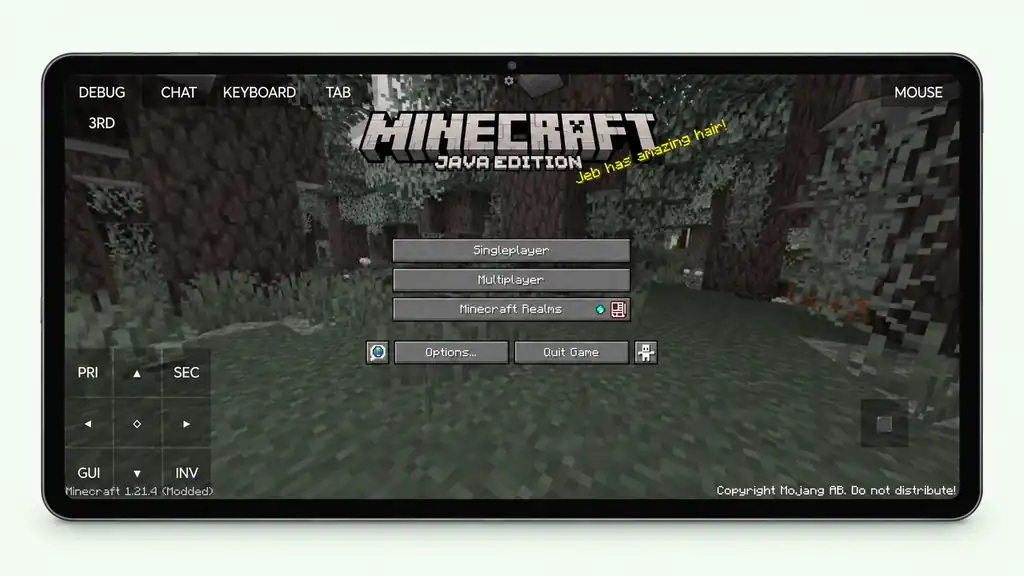
A successful launch reaches the Minecraft title screen. The example menu comes from an OptiFine setup and displays “Modded”; a plain profile can display different version information. Both still use the familiar Singleplayer, Multiplayer and Options menus.
6. Open a Small Single-Player World
- Choose Singleplayer.
- Open an existing compatible test world, or choose Create New World.
- For a new world, enter a name and choose your preferred game mode. Creative is a useful option when you only want to practise controls.
- Wait for terrain to load, then test movement, looking around, jumping and inventory access.
- When you finish, use the game’s save-and-quit option and wait for it to return to the title screen.
Use a fresh world or a backup while testing another Minecraft version. A world saved by a newer release may not work correctly when opened in an older one.
Learn the On-Screen Controls
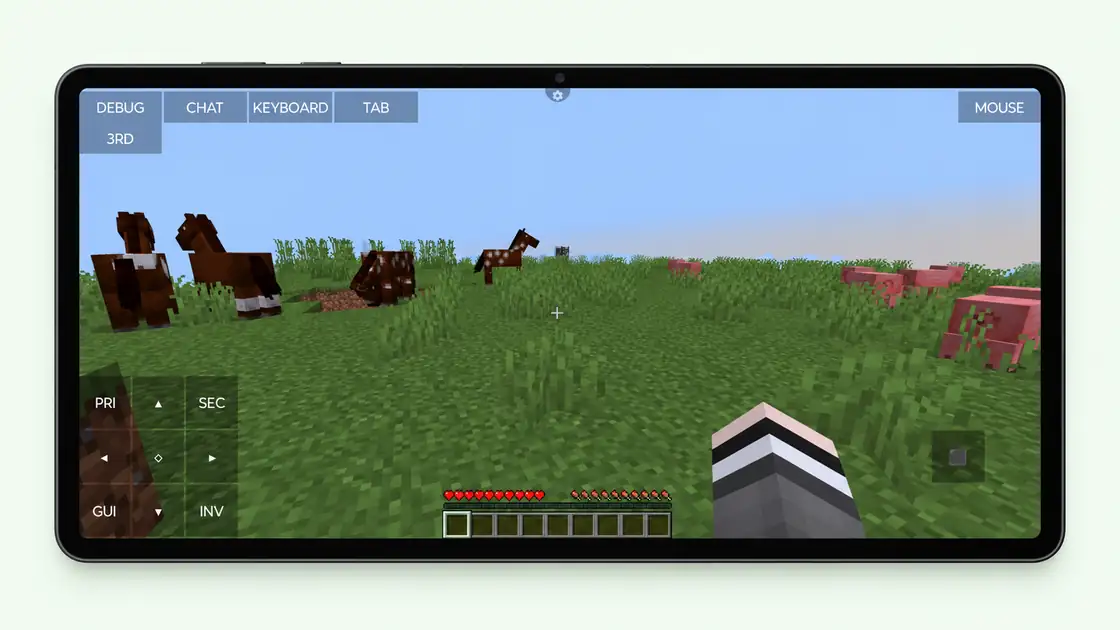
PojavLauncher translates touch input into the keyboard and mouse actions used by Java Edition. Button labels and positions depend on the selected layout, so learn the action behind each control rather than memorizing its location.
| Action | What to use |
|---|---|
| Walk | The directional arrows or movement control in your layout. |
| Look around | Drag in the viewing area using the configured touch or mouse mode. |
| Jump | The button assigned to Space/Jump. |
| Break or attack | The primary mouse action, labelled PRI in this example. |
| Place or use | The secondary mouse action, labelled SEC. |
| Open inventory | The inventory control, shown as INV. |
| Type or chat | The Keyboard or Chat controls supplied by the layout. |
Some builds also provide gestures such as holding to break and tapping to place. If those do not behave as expected, check the Disable gestures setting and your active input mode. A mouse-action button and a touch gesture are separate ways of sending input.
7. Adjust Button Size and Layout
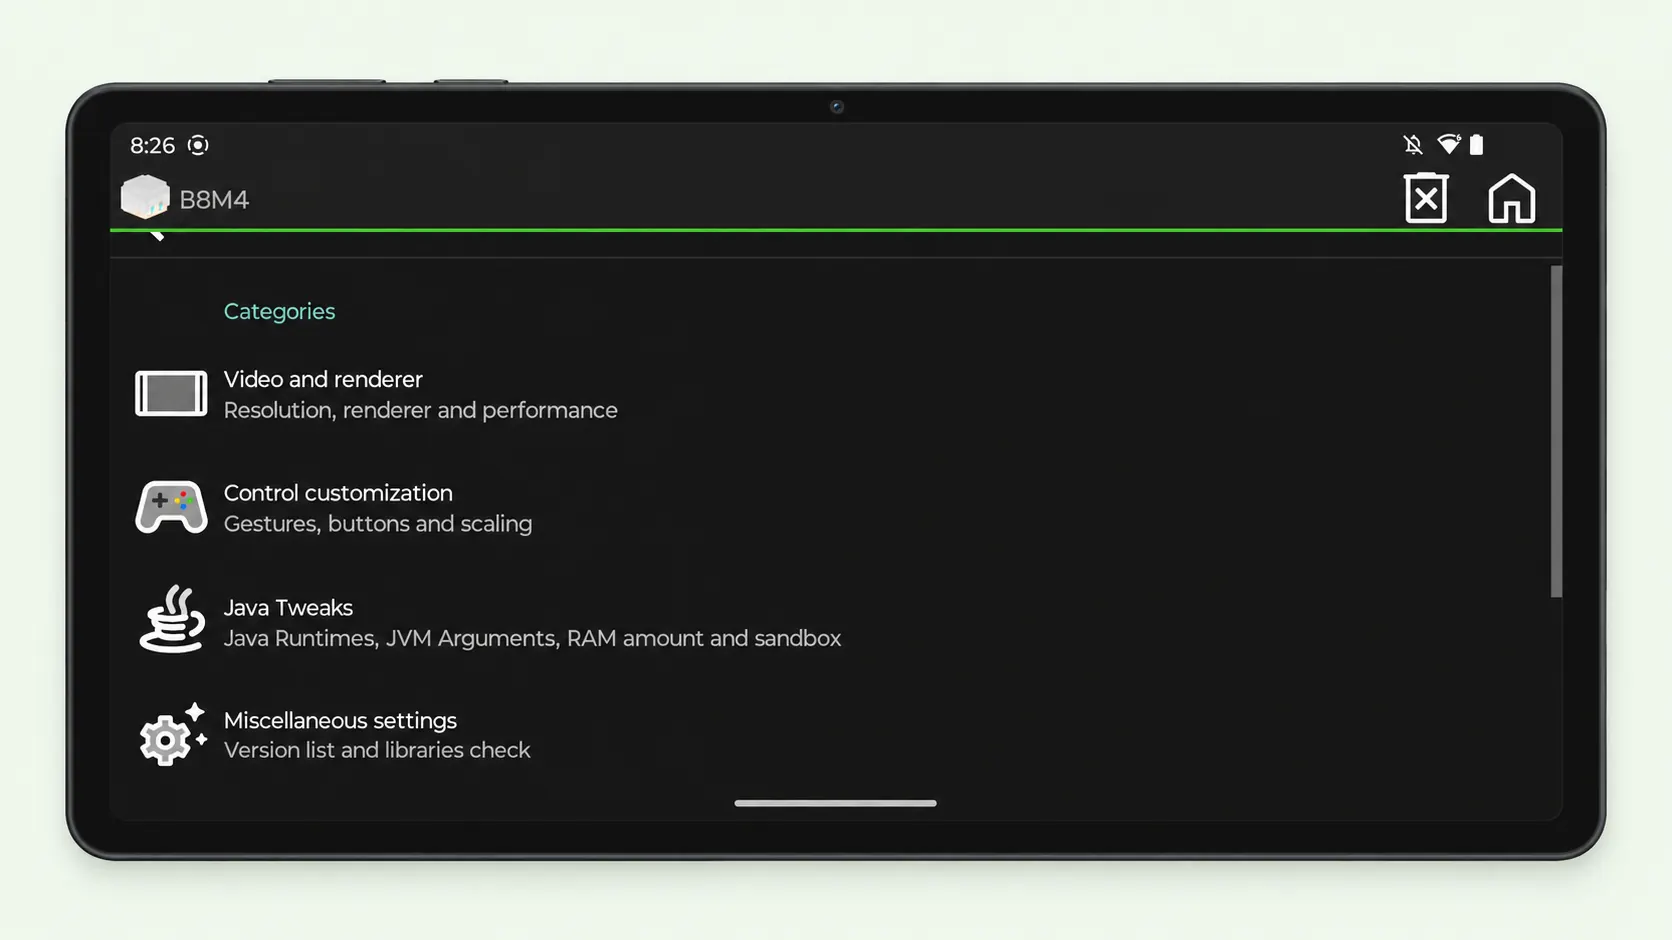
Open the launcher’s settings icon at the upper right, then choose Control customization. This area includes gesture and button-scaling options in the illustrated interface. Increase button scaling if controls are too small, then return to the test world to check the result.
For changes to individual buttons, use Custom Controls on the launcher’s main screen and the editor provided by your build. Save a separate copy where possible. Keep enough room for camera movement and avoid overlapping controls you need at the same time.
The profile editor can also have a Default controlmap → SELECT field. Use it when you want that particular profile to use a saved layout instead of the global default. Save the profile after changing its selection.
Set Up Graphics and Memory Carefully
The launcher settings and Minecraft’s own Video Settings do different jobs. Start with defaults, make one change at a time and test in the same world so you can compare the result.
Video and Renderer
Open settings → Video and renderer for the launcher’s graphics options. A renderer handles the graphics translation used on your Android device. Its compatibility depends on the GPU, game version and any graphics-related mods.
Leave a working renderer alone during the first test. If the game shows a black screen or graphics errors, check a renderer suitable for that setup. A renderer used successfully in one tutorial is not automatically right for another device.
The resolution scaler changes the resolution used to render the game. Lowering it can reduce graphics load, at the cost of a softer picture. You can also reduce render distance inside Minecraft → Options → Video Settings. These are different adjustments; try them separately.
Java Tweaks and Memory Allocation
Go back to the launcher settings and open Java Tweaks. The memory allocation control changes how much memory Minecraft may use. Runtime Manager and JVM launch arguments are separate settings in that menu.
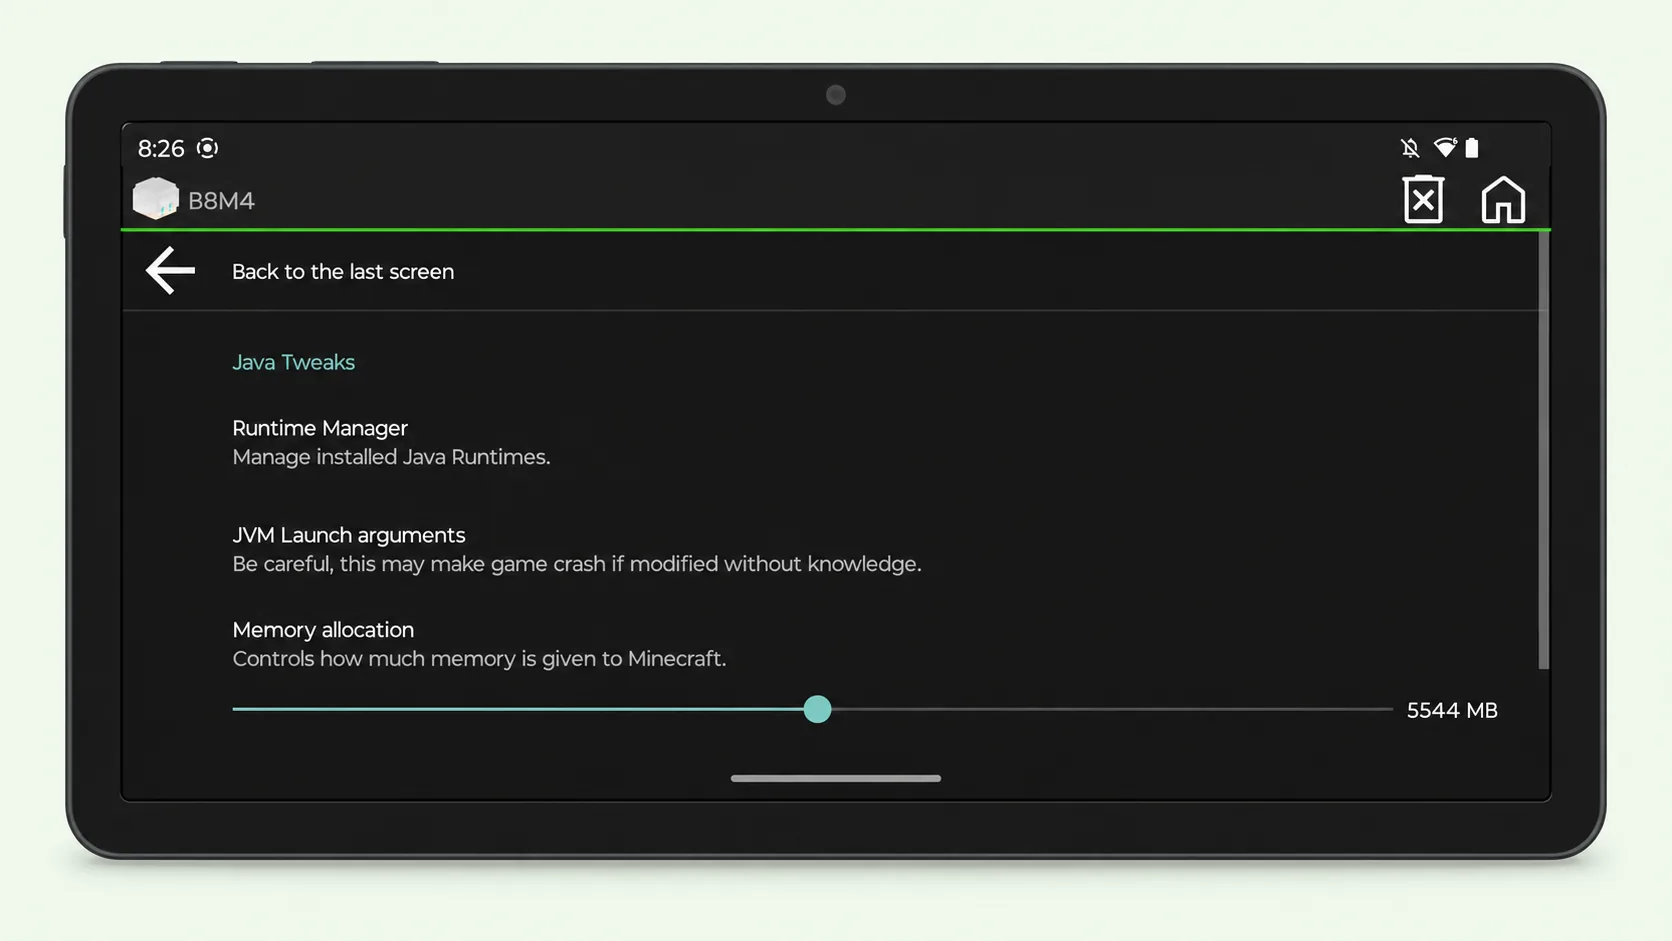
The memory value shown in the picture belongs to that example device. Do not copy it onto a phone with less available RAM. Leave enough memory for Android, and avoid pushing the allocation to its maximum just because the slider allows it.
If a game version needs a particular Java runtime, confirm that your launcher build provides a compatible one. Extra RAM cannot fix the wrong runtime, an unsupported renderer or incompatible mods. Leave JVM arguments unchanged unless you understand the setting you are changing.
Join a Java Edition Server
- Check the server’s required Minecraft version, account rules and any required mods.
- Launch the matching profile, then open Multiplayer from the title screen.
- Choose Add Server or Direct Connection and enter the address supplied by the server owner.
- Use the launcher’s Keyboard control if the Android keyboard is not visible.
- Select the server and choose Join Server.
If you get a version mismatch, return to the launcher and select the right game release. If authentication fails, check the selected Microsoft account and its game access. A Bedrock server is not a normal Java server unless its owner specifically provides a compatible cross-play connection.
Add Mods or Resource Packs After Setup
Once the plain game runs, create another profile for the loader required by your mods. Match the Minecraft version, Forge or Fabric loader, and every mod dependency. Launch that empty loader profile once before adding a group of mod files.
Use the Open Game Directory shortcut to find the game folder for the active setup. Do not rely on a package-specific Android path copied from someone else’s phone. Follow our PojavLauncher mods guide for individual JARs and modpack imports.
Resource packs change textures and other resources; they are not installed as mod JARs. If that is what you want to change, use the resource pack download and setup guide. Test a simple pack before combining it with shaders or a large mod collection.
Fix Common Setup Problems
The launcher opens, but sign-in fails
Check your connection and confirm the account you are using. Archived authentication code can stop working with current services, so a fresh install of an older APK is not a guaranteed fix. Record the error rather than switching accounts at random.
Play downloads files but never reaches the game
Check storage and the download/task messages. Try a supported plain profile without extra mods. If the download is complete but launch fails, compare the game’s runtime requirements and renderer with the build you installed.
Minecraft runs slowly or closes while playing
Lower render distance, remove demanding shaders and test without extra packs. Check that your memory allocation leaves room for Android. A large world, busy server or heavy modpack can need more resources than the small test world.
The controls are too small or do not respond
Check button scaling, gesture settings and the selected control map. Close menus or text fields before testing movement. If an edited layout causes the problem, return to the saved original and adjust a copy.
If you still need help, the community and archive information page explains the project’s public resources. Keep your build name, Minecraft version, device details and error log ready when describing the problem.
Frequently Asked Questions
Is PojavLauncher still being updated?
The original project is discontinued and archived. This guide covers the archived Android launcher; do not assume new Minecraft releases will be supported.
Do I have to use the version shown in a screenshot?
No. The images explain the menus. Choose a supported game version for your device, world, mods or server, rather than copying an example number.
Can I play without downloading the game files first?
No. The required files must be downloaded for the selected setup before that setup can launch. Initial sign-in, new downloads and multiplayer also need a connection.
Are these the same steps on an iPhone?
Account and game concepts overlap, but installation, JIT and device support differ. Follow the separate iOS guide rather than using Android APK installation steps.
Using the Glow Worm variant? See our PojavLauncher Glow Worm setup guide for its additional renderer and plugin options.